ブログ


Nuxt.jsでブログを作る
こんにちは、T.Uです。
Nuxt Contentを使って、ブログを作る機会がありましたので、今回はNuxt Contentについてまとめたいと思います。
目次
Nuxt Contentとは
公式サイトには下記のように説明されています。
nuxt/contentモジュールを使ってNuxtJSアプリケーションを強化します。content/ディレクトリに書き込むことで、MongoDBのようなAPIを使ってMarkdown、JSON、YAML、CSVファイルを取得します。これはGitベースのヘッドレスCMSとして動作します。
https://content.nuxtjs.org/ja/v1/getting-started/introduction
content/ フォルダにあるマークダウンファイルやJSONファイルなどからブログを作ることができるNuxt.jsのモジュールです。
全文検索や目次の自動生成、Prism.jsを使うことでコードブロックのシンタックスハイライトをすることも可能です。
プロジェクトの作成
Nuxt.jsのインストール手順に沿って、プロジェクトを作成します。
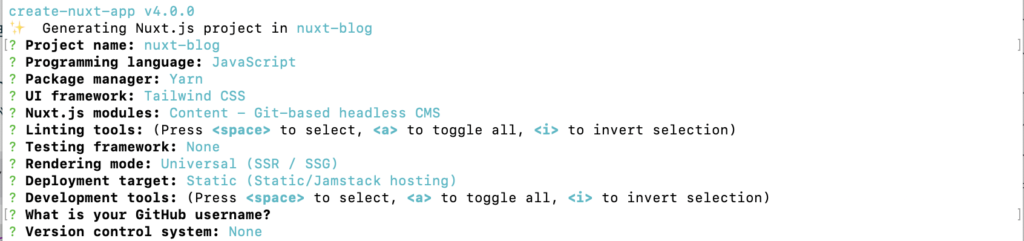
yarn create nuxt-app nuxt-blogCSSのフレームワークとしてはTailwind CSS、モジュールにContentを使用するのでプロジェクト作成時に選択します。
その他、Package managerやLinting toolsはお好みで。
作成したプロジェクトルートに移動し、開発サーバーを起動します。
cd nuxt-blog
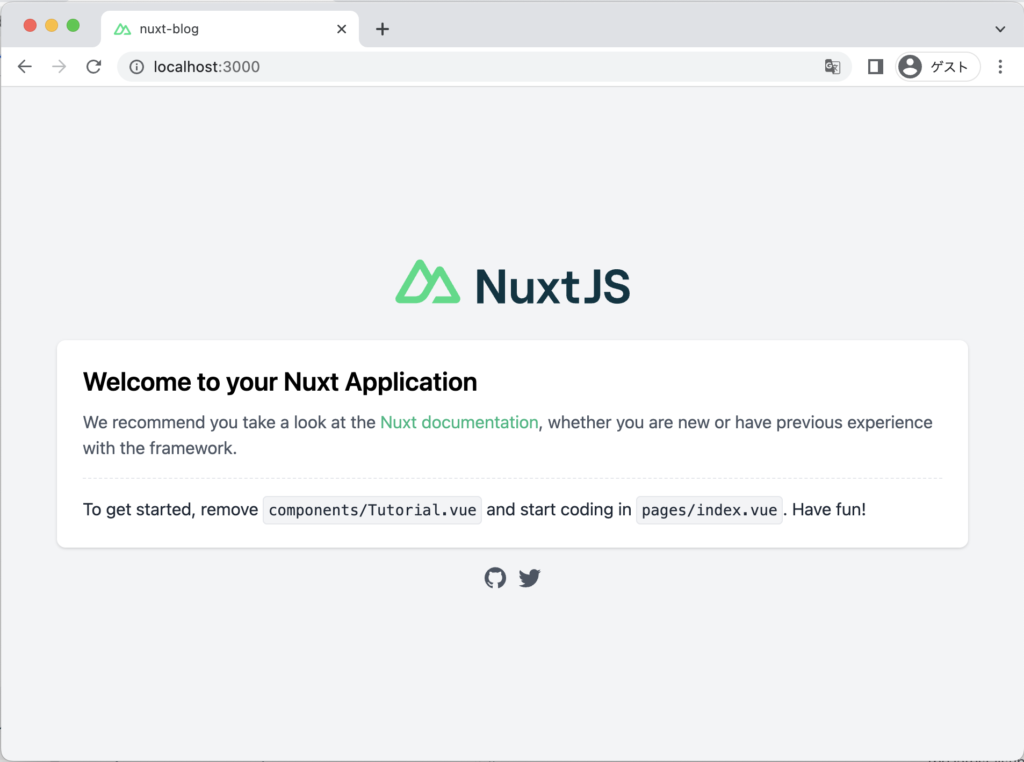
yarn devhttp://localhost:3000/ にアクセスし、「Welcome to your Nuxt Application」の表示ができていればプロジェクト作成は完了です。
追加モジュールをインストールする
Nuxt.jsにはaxiosやPWA、Google Fontsなどを簡単に導入できるモジュールが準備されています。
今回はDay.jsとGoogle Fontsのモジュールを導入します。
Google Fontsモジュールを追加
ターミナルを開きプロジェクトルートで下記のコマンドを実行し @nuxtjs/google-fonts モジュールをインストールします。
yarn add --dev @nuxtjs/google-fontsnuxt.config.jsのbuildModulesに下記を追記し、ウェブフォントが読み込まれるように設定します。
今回は私が大好きな、QuicksandとM Plus 1pを使用します。
buildModules: [
    ['@nuxtjs/google-fonts', {
        families: {
            Quicksand: [300],
            'M PLUS 1p': [300]
        }
    }]
],
Day.jsモジュールを追加
Google Fontsモジュールの導入と同様に下記のコマンドを実行し、@nuxtjs/dayjs をインストールします。
yarn add @nuxtjs/dayjsnuxt.config.jsのmodulesに下記を追記します。
modules: [
    '@nuxtjs/dayjs'
],
以上の設定で、Day.jsを使用することができます
// <template>タグの中で使用する
{{ $dayjs().format('YYYY-MM-DD') }}
// <script>タグ内で使用する
this.$dayjs().format('YYYY-MM-DD')
コンポーネントを作成する
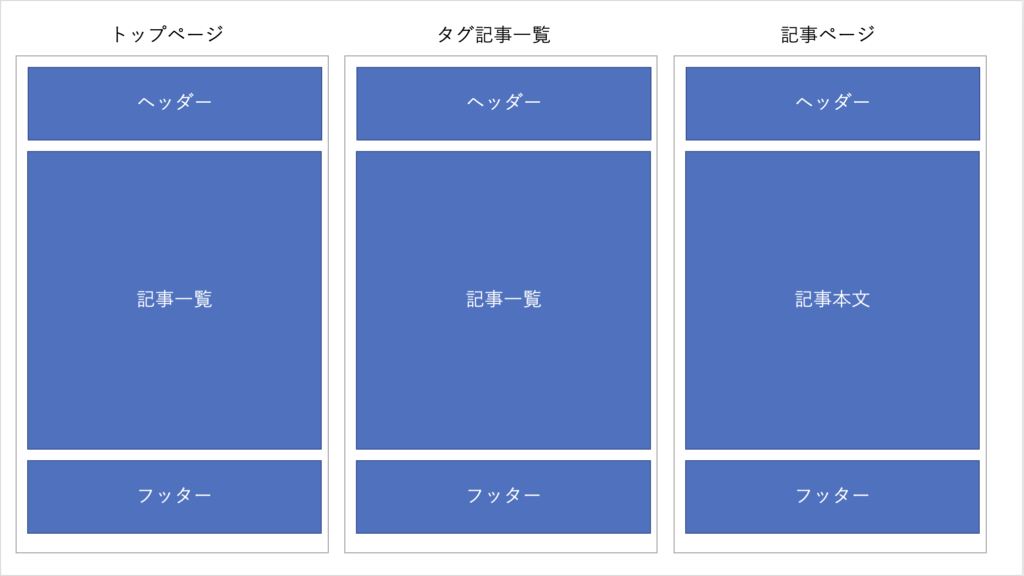
この記事では、トップページと記事ページのみを作成しますが、タグ記事一覧とトップページのレイアウトはほぼ共通で使用できるので、ヘッダー・フッター・記事一覧のコンポーネントを作成します。
ヘッダーとフッターを作成する
components 配下に AppHeader.vue と AppFooter.vue を作成し、以下の内容でコーディングします。
<template>
  <header>
    <NuxtLink to="/" class="text-xl font-quicksand tracking-wide text-gray-800">
      Nuxt.js Blog
    </NuxtLink>
    <div class="w-full my-10 text-center select-none text-gray-500" style="letter-spacing: 20px">°°°</div>
  </header>
</template>
<template>
<footer class="flex flex-col text-sm text-gray-800 font-quicksand">
<div class="w-full my-10 text-center select-none text-gray-500" style="letter-spacing: 20px">°°°</div>
<ul class="flex flex-col mb-3 justify-center space-y-2 sm:space-y-0 sm:space-x-5 sm:flex-row">
<li>
<NuxtLink to="/about" class="transition-colors duration-300 rounded px-2 py-1 hover:bg-gray-400">About</NuxtLink>
</li>
<li>
<NuxtLink to="/profile" class="transition-colors duration-300 rounded px-2 py-1 hover:bg-gray-400">Profile</NuxtLink>
</li>
</ul>
<p class="text-center mt-3">
© 2022 Nuxt.js Blog
</p>
</footer>
</template>記事一覧を作成する
記事一覧コンポーネントは記事データを受け取るため、props で 配列を受け取れるようにしておきます。
<template>
  <div>
    <div v-for="(article, index) of articles" :key="article.slug"
         class="flex flex-col py-10 border-b-2 text-gray-800"
         :class="(index + 1) === articles.length ? 'border-none' : ''">
      <div class="text-xs mb-2">
        <p>{{ $dayjs(article.updatedAt).format('YYYY-MM-DD') }}</p>
      </div>
      <NuxtLink :to="{ name: 'article-slug', params: { slug: article.slug }}" class="inline-block">
        <p class="text-2xl font-light leading-none">{{ article.title }}</p>
      </NuxtLink>
    </div>
  </div>
</template>

<script>
export default {
  props: {
    // 記事一覧を受け取る
    articles: {
      type: Array,
      required: true
    }
  }
}
</script>
レイアウトファイルを作成する
layouts 配下に default.vue を作成し、先程作成した、AppHeader.vue と AppFooter.vue を記載します。
<template>
  <div class="py-16 mx-auto max-w-2xl">
    <!-- components/AppHeader.vue -->
    <app-header />
    <!-- パスに一致するpagesファイルが呼ばれる -->
    <Nuxt />
    <!-- components/AppFooter.vue -->
    <app-footer />
  </div>
</template>
各ページを作成する
pages 配下に index.vue と article/_slug.vue ファイルを作成します。
記事一覧ページを実装する
index.vue に以下の内容コーディングして、記事一覧を実装します。
<template>
  <main>
    <article-list :articles="articles" />
  </main>
</template>

<script>
export default {
  name: 'IndexPage',
  async asyncData({ $content }) {
    const articles = await $content()
      // sortByを指定し、updatedAt(更新日)の降順にソート
      .sortBy('updatedAt', 'desc')
      // limitを指定し、10件のみ取得
      .limit(10)
      .fetch()

    return {
      articles
    }
  }
}
</script>

<style>
*,
.font-mplus1p {
  font-family: 'M PLUS 1p', sans-serif;
}
.font-quicksand {
  font-family: 'Quicksand', sans-serif;
}
</style>
記事データの取得について
Nuxt Contentは、以下のようなメソッドチェーンをする形で、 content ディレクトリに存在する記事データを取得します。
const articles = await $content()
  .sortBy('updatedAt', 'desc')
  .limit(10)
  .fetch()
index.vue には登場しませんが、where() でフィルタリングを行ったり、search() で全文検索を行うことができます。
その他のメソッドは、ドキュメントの Fetching content にまとめられています。
// フィルタリング
await $content().where({ title: 'Blog' }).fetch()
// 全文検索
await this.$content('articles').search('welcome').fetch()
記事ページを実装する
次に、article/_slug.vue に以下の内容コーディングして、記事ページを実装します。
<template>
  <main>
    <h1 class="text-3xl text-center">{{ article.title }}</h1>
    <nuxt-content :document="article"/>
  </main>
</template>

<script>
export default {
  async asyncData({ $content, params }) {
    const article = await $content(params.slug).fetch()

    return {
      article
    }
  }
}
</script>
記事データ取得について
article/_slug.vue というファイル作成すると http://localhost/article/hello-world にアクセスした場合に、「hello-world」 の部分 params.slug で取得することができるようになります。
取得した params.slug を、 $content() に渡すことで、パスパラメータで指定された記事データを取得します。
const article = await $content(params.slug).fetch()詳しくは、ドキュメントの Dynamic Pages をご参照ください。
動作確認
ここまでコーディングができたら、記事ファイルを作成し動作を確認します。
本記事では .md ファイルを作成していますが、.md ファイル以外にも .yaml・.yml・ .csv・.json・.json5・.xml ファイルを読み込むことができます。
content 配下に hello-world.md を作成し、以下の内容を追記します。
---
title: Hello World
description: Nuxt Content Blog Page!
---

# H1タグ

## H2タグ

### H3タグ

こんにちは!pタグ

* リスト1
* リスト2
* リスト3

[リンクテキスト](https://www.google.com/)
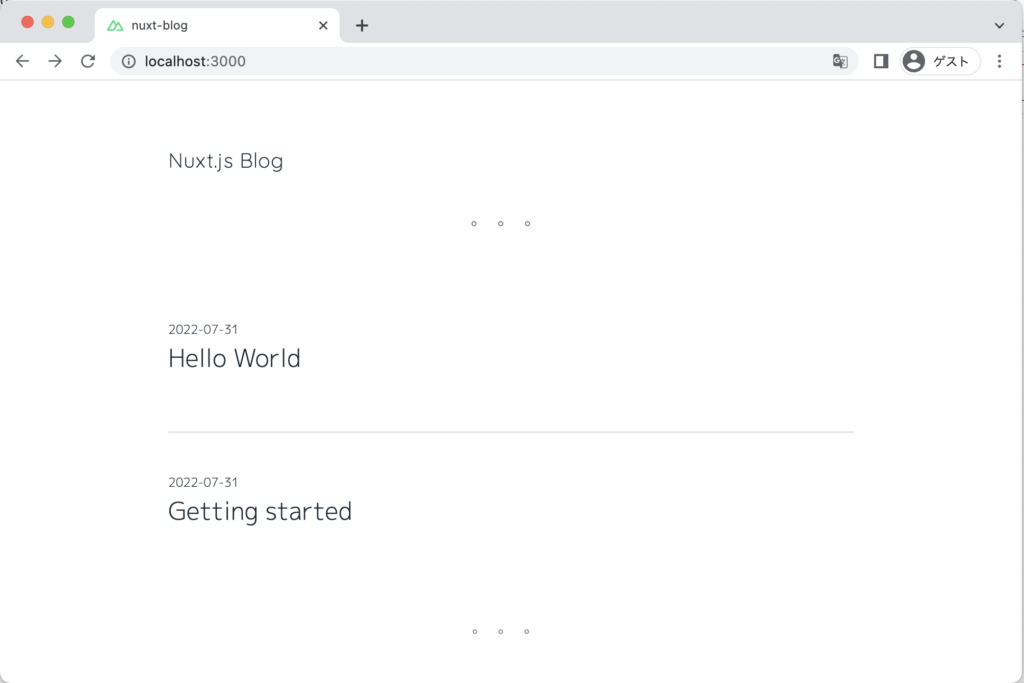
ビルドが終わり、 http://localhost:3000 にアクセスすると、記事一覧と記事ページを表示することができるようになります。
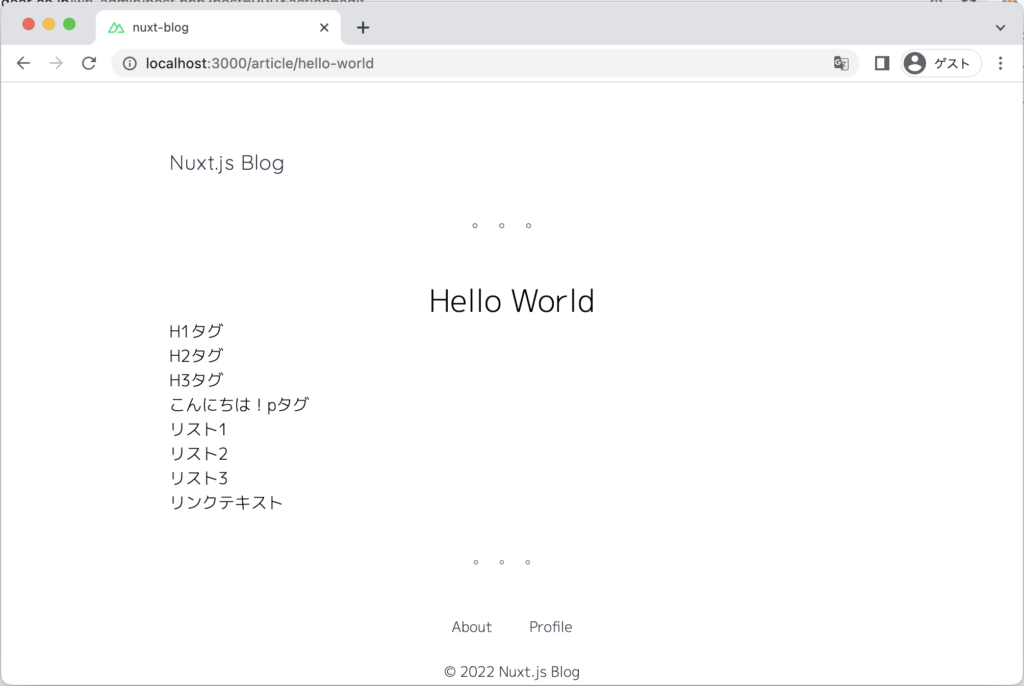
記事ページの見た目を整える
今の状態では記事部分には何もCSSがあたっておらずかなり微妙な見た目になっています。
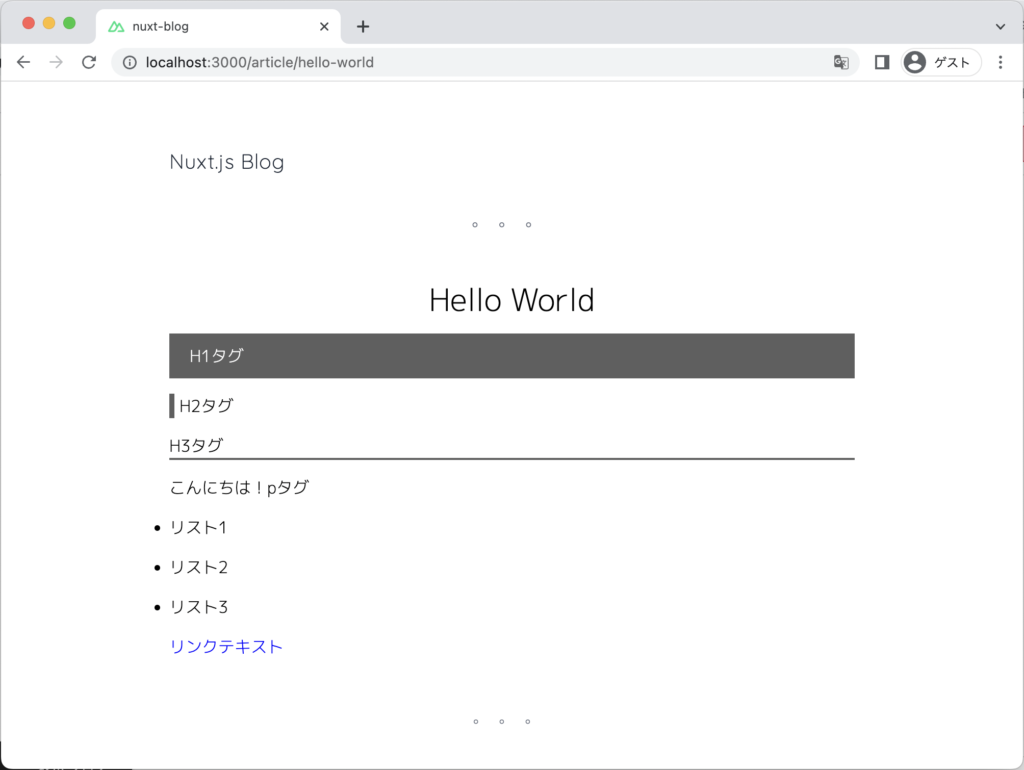
Nuxt Contentは、.nuxt-content クラス以下のh1タグやpタグにCSSを指定することで見た目を調整することが可能です。
pages/article/_slug.vue を開き、CSSを追記します
<style>
.nuxt-content * {
  margin-top: 15px;
  margin-bottom: 15px;
}
.nuxt-content h1 {
  background-color: #000000A0;
  color: #fff;
  padding: 10px 20px;
}
.nuxt-content h2 {
  border-left: 5px solid #000000A0;
  padding-left: 5px;
}
.nuxt-content h3 {
  border-bottom: 2px solid #000000A0;
}
.nuxt-content ul {
  list-style: disc;
}
.nuxt-content a {
  color: blue;
}
</style>
http://localhost:3000/article/hello-world にアクセスすると画像のように記事部分にCSSをあたっていることを確認できます。
まとめ
今回は、Nuxt Contentでブログの作り方を紹介しました。
本記事では紹介しませんでしたが、yarn generate すれば静的サイトとしてファイルを生成することができ、S3とCloudFrontを利用し、ウェブサイトとして公開することも可能です。
また、目次や前の記事・次の記事なども実装することができます。
株式会社ウイングドアは福岡のシステム開発会社です。
現在、私達と一緒に"楽しく仕事が出来る仲間"として、新卒・中途採用を絶賛募集しています!
ウイングドアの仲間達となら楽しく仕事できるかも?と興味をもった方、
お気軽にお問い合わせ下さい!